Showing posts with label DIY. Show all posts

Monday, May 18, 2015

DIY Toilet Rolls Cars - Vroom Vroom!


I love a good craft activity especially one that uses waste materials found at home. This is one that I have bookmarked a while ago and finally got down to doing with Xue. Finally I'm making good use of the toilet paper rolls that I have been secretly stashing away for awhile. lol. First we used them for stamping wheels, now we are going to make some paper cars!

This activity is done in two sessions.

Session 1: We painted three toilet rolls together and let them dry overnight.


Then at night, I prepared the materials for the activity basket.
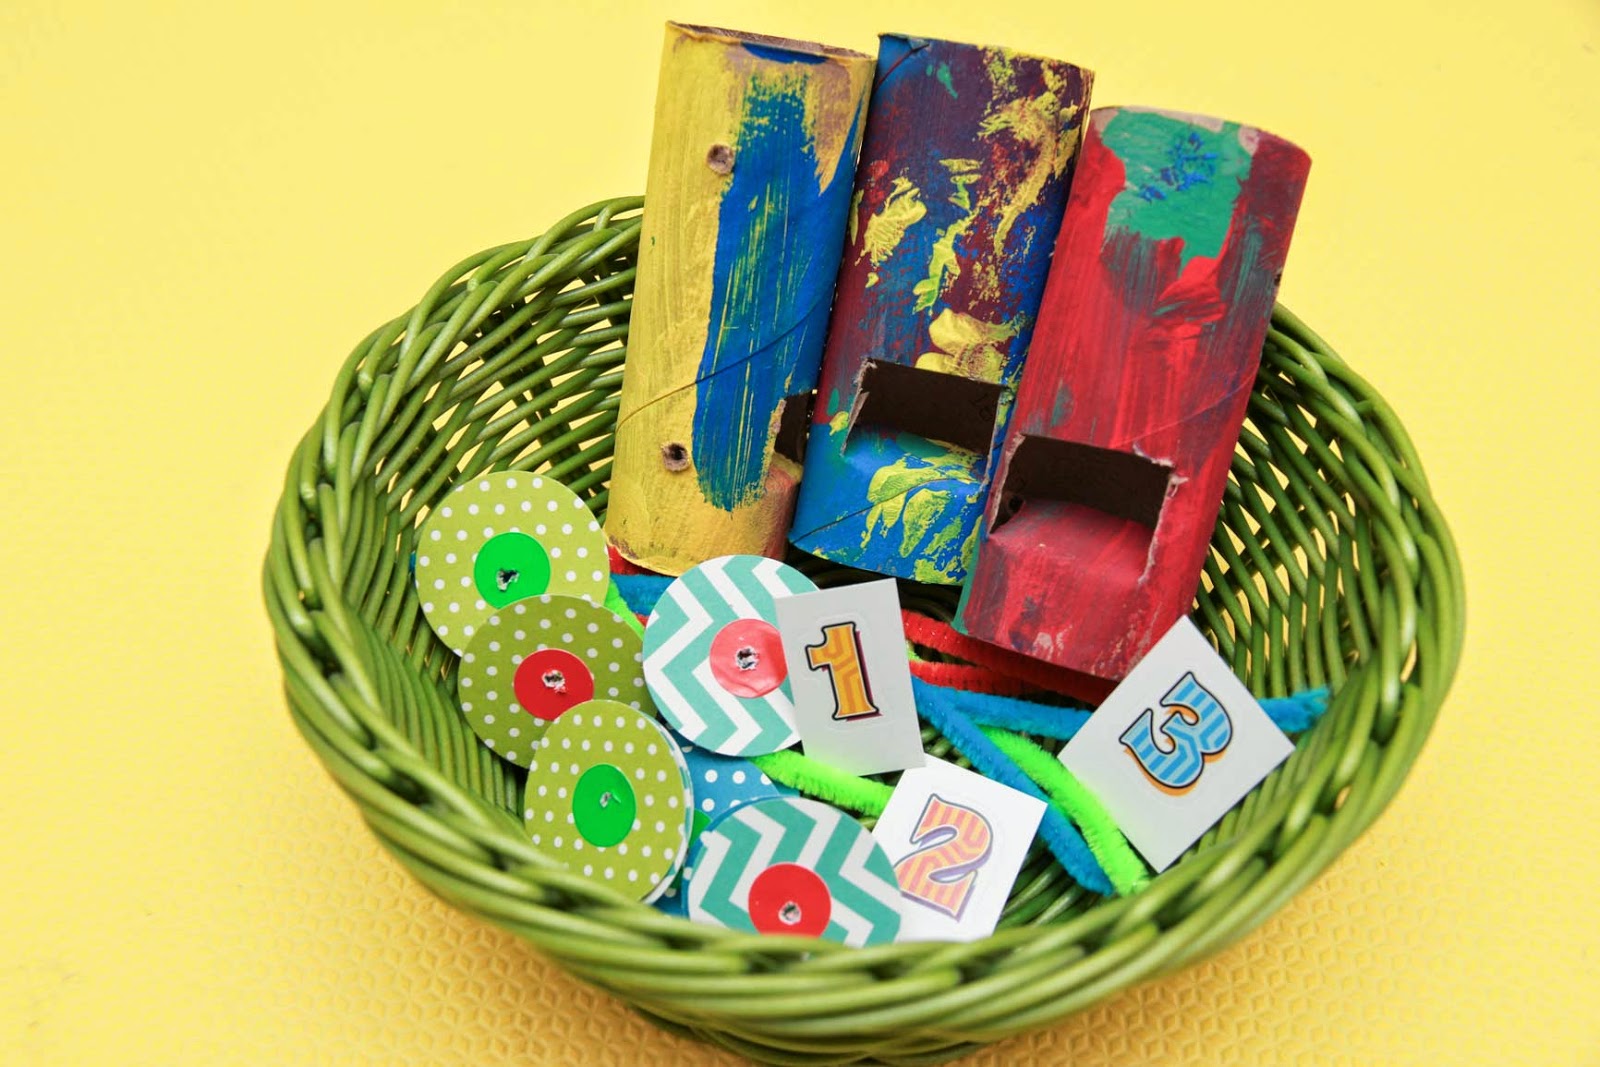

1) Cut out some circles using heavy weight yardstick paper and poke a hole in the middle for the pipe cleaners to go through. For young tots like Xue who is still developing his fine motor skills, make bigger holes. If your kid has pretty good fine motor skills, then smaller holes may be fun as they try to get the pipe cleaners through the holes.
2) Poke 4 holes on each toilet paper roll at where the wheels will be attached. Same thing, big holes for young tots. Cut out a 3 by 3cm square on each roll for the car seat.
3) I got number 1 to 3 stickers for numbering his cars.
4) I cut some pipe cleaners to approximately 12cm long. $2 from Daiso! Keep them short, as shorter pipe cleaners are easier to handle for young tots.

Session 2:
Xue pasted the numbers on the cars first. Then I showed him the holes on the rolls and wheels and how to poke a pipe cleaner through the toilet rolls first. Young tots will definitely need some help here to get the pipe cleaners through the toilet rolls. After which, we put the wheels through the pipe cleaners. I completed the last part of twirling the pipe cleaners into circles to secure the wheels.


This is not the easiest activity for my 26 months old tot. There were times when he just couldn't get the pipe cleaners through, got frustrated and didn't want to try anymore. That's when I enlarged the holes and encouraged him to try again. After a few attempts, he got the pipe cleaners through and he was really pleased! Good job for persevering little buddy!


Thursday, April 30, 2015

ABC and numbers with stickers

Honestly, I don't know any toddlers who don't like stickers. Give Xue some stickers and he will be happily peeling and sticking away. I like stickers too! There are so many activities we can do with stickers, other than simply sticking them all over the place and on mummy. Lol. Yes my little Xue loves to decorate me with all his funky stickers and there's a high chance that you will see a giraffe on my blouse, a star on my face or a Lightning McQueen on my bump.

Xue has taken interest in the ABCs and 123s he sees around the house and this is one good activity for toddlers like him who are learning to recognise alphabets and numbers. I gave him some alphabet stickers with an alphabet chart and some number stickers with a number chart. There are plenty of alphabet and number charts online, just google for them and print the ones you like. One suggestion here, do the number chart first as 10 numbers are more manageable as compared to 26 alphabets and do the alphabet chart on a separate day. This will keep them interested in the activity. Also, if possible, find stickers that do not repeat the alphabets and numbers. The alphabet stickers I used had multiples of some alphabets and it's increased the difficulty level for the tot who is learning to differentiate 26 alphabets.


I showed him how the alphabets/ numbers stickers match those on the charts and how we then stick the stickers on the chart when there's a match. Very quickly, he understood the activity and got to work immediately. He was pretty excited whenever he found a match.


Once completed, these alphabets and numbers charts looked pretty good as posters on the wall!


Wednesday, June 5, 2013

Return of Baby Batman + DIY Batman costume


Everyone loves a theme party and part of the fun is to dress up for the theme! The Wong family was invited to a birthday party with a cool 'Princes & Princesses, Superheros & Villains' theme last Sunday. And of course, I jumped at the chance to dress up my family!

But here's the not so fun part, getting the costumes. I don't like buying costumes because I am so sure it's going to be worn just once. It's not fun going to parties as the same character, right??. I prefer renting costumes but on second thoughts, the rental cost can probably buy my baby a few packs of diapers plus no shops rent out costumes for a three months old baby, so this option is out. OK, let me try to make one!

I asked hubby for ideas on which superhero or villain should Zachy be and (I have no idea why) he immediately suggested Bowser. Yes, this big bad guy in the Super Mario game.

Photo from here

I really did give it a serious thought (though just for ten minutes) and bleah, I gave up. The dragon head, the horns, the claws and the spiky turtleshell? Wah, too challenging. 

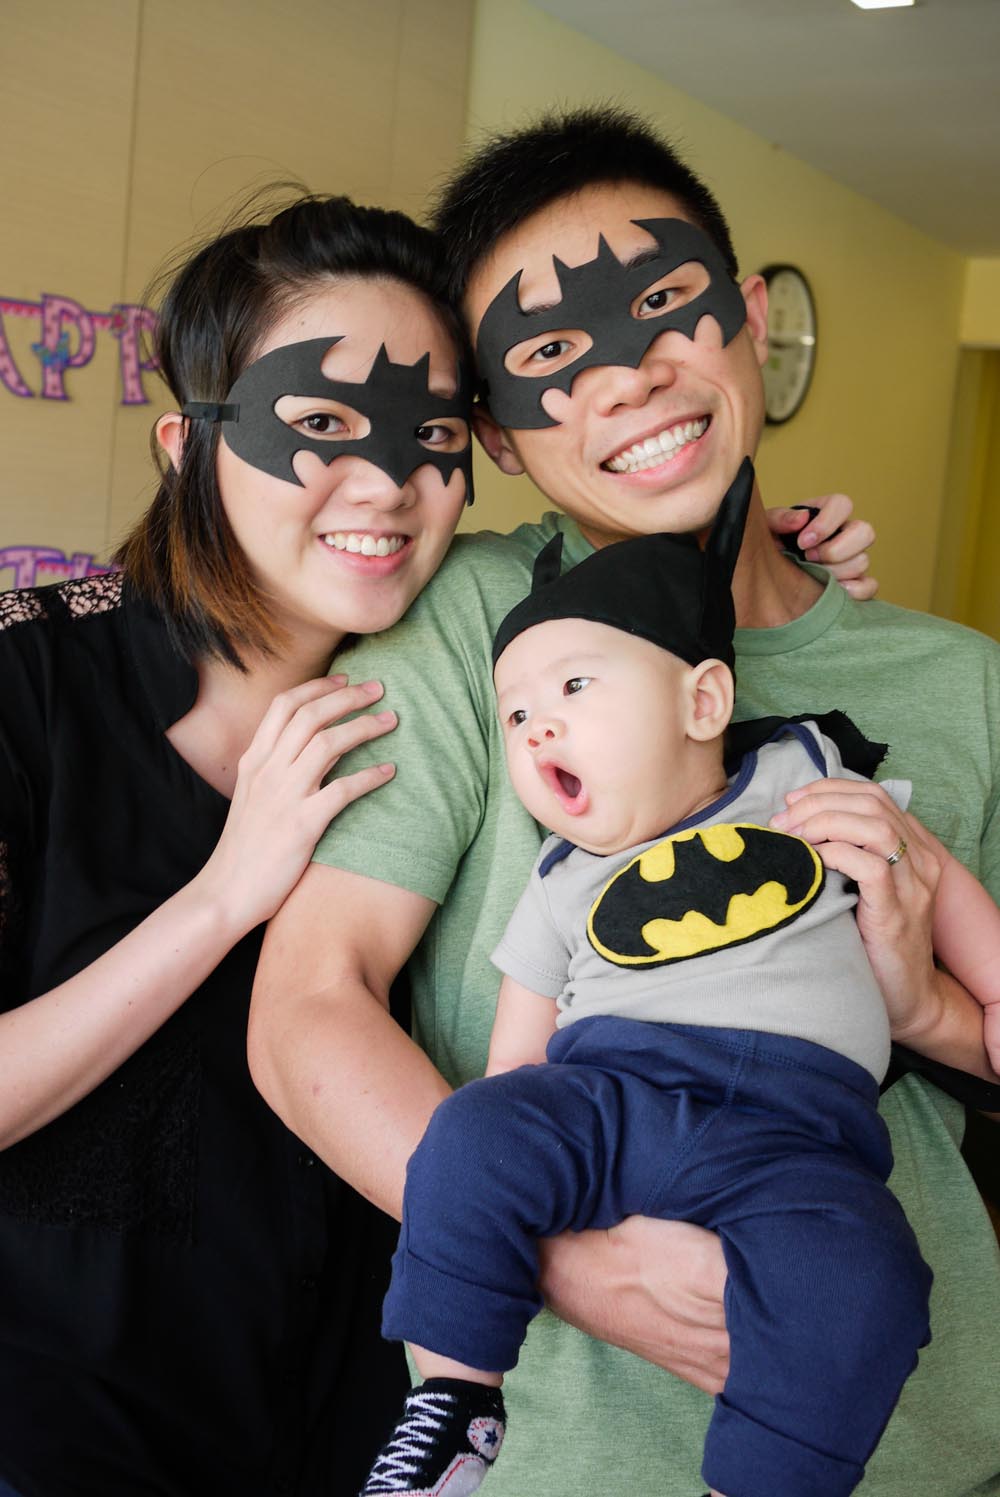
As I was browsing through the web for ideas, I saw the perfect superhero character for Zachy boy. He shall be a Baby Batman! Seemingly easy costume to make and I have all the materials needed. I made a batman logo first using black and yellow felt and sewed it onto his grey onesie. Then I sewed a black cape.


There, we have a batman costume!


The ambitious me wanted to make him a Batman baby hat too. The attempt isn't not too successful which you can see from the photo but I still made him wear it. hah! The earlier two prototypes I made with scrap clothes were hilarious! Even my MIL can't help laughing when I told her I'm making a batman hat because she was so sure Zachy looked like a bull and a mushroom. Well, after this episode, I sure know how to make a bull's hat or a mushroom's hat for other costume parties. lol.


I made two simple masks for ourselves and we went to party as a Batman family!


After the party, I simply detached the logo and the cape and we have his onesie back to original! But of course, not after we took many photos of our superhero baby!


Linking up with:
new button

Monday, May 20, 2013

DIY Snake bolster

I saw a snake soft toy in this book and I knew I must make one for Zachy boy. Because one, this year is the year of the snake and this makes Zachy boy a snake baby! Two, this is a really short project which can be completed in an hour. And three, I have all the materials I need!

I cut out two pieces of yellow cloth using the snake pattern from the book. It's easy to just draw out the pattern on your own too. I shortened the length of the snake to approximately 20" as I wanted it to be of a bolster size for Zachy boy.

The eyes are made of felt and hand sewed in place using blanket stitch. Then I picked out some scrap fabrics and ribbons and arranged them across the body of the snake. I used a red velvet ribbon for the tongue. That's Zachy boy's name at the tail. Haha, I'm so into personalising Zachy boy's stuff these days. Once I was pleased with the arrangement, I machined sewed the fabrics and ribbons in place and hand embroidered Zachy's name onto the snake. It is helpful to baste the fabrics and ribbons first to keep them from moving out of place during the machine sewing process.

I sewed a ric rac ribbon on the underside of the snake too. Placing the right sides of the snake body fabric together, I sewed along the edge with a 1/4" seam allowance and left a 2" opening for turning the fabric and stuffing the bolster.

Stuffed in the toy filling, stitched up the opening and the snake bolster is completed! Hisss!


Linking up with:
new button

Wednesday, April 24, 2013

DIY Owls baby mobile

Here's a confession. I didn't think my baby boy will pay much attention to a handmade baby mobile. Well, there won't be any moving stuff nor music or flashing lights. But I just went ahead and made one because I thought making a mobile is fun for me. lol. Thus I was pleasantly surprised when Zachy boy actually showed quite a bit of interest in it. He will stare intently at the hanging ornaments and get amused by the swinging mobile when he hits one of the ornaments. See, my boy love it! 


Hee, if you like to make one too, read on!

Materials used: 6 felt ornaments, ribbons and thread, 1 brown paper wire stick, glue gun


First of all, decide a theme for your mobile and think of what you like to have on it. I decided on a night theme for Zachy boy's mobile and sewed 3 felt owls, 2 felt stars and 1 felt moon. To make these cute little owls, check out this tutorial. You can download the pattern for the felt owl from the website too. I glued a small piece of ribbon at the top of the ornaments and created a loop (for easy hanging). I used mainly blanket stitch to put these felt ornaments together. This tutorial is really helpful if you like to learn how to sew blanket stitch and how to start and end it.


Now twist the wire stick into a circle and secure the ends together with the glue gun.


To make the top part of the mobile, loop 6 strands of thread through the wire stick at equal interval round the circle.


Holding all 6 strands of thread up, tie a knot at the centre. Divide all the strands of the thread into two parts, make 2 braids with them and end the two braids with a knot to create a small loop (for easy hanging again).


Now just tie all the felt ornaments onto the circular wire stick and the baby mobile is completed!


Linking up with: 
new button

Friday, April 5, 2013

DIY Changing pad

Changing diaper for my baby is an exciting affair. Because I can never tell when he is really done. When I think it's safe to clean his bum, he may surprise me with an additional spurt of poo or pee. Thus the changing pad has been declared by all at home as the most useful out of all the stuffs I made because it has saved all our mattresses from that additional spurt of pee and/or poo during diaper change countless times.

Hee, of course the changing pad cannot save us all the time. Once, my boy projected his pee all over me and just the other day, he let out an explosive blast of poo and on both occasions, the pee and poo went way beyond the area of the changing pad. I must elaborate on the latter. We reacted immediately by holding up his diaper to block the poo but the force was so tremendous, the poo exploded out from the sides and splattered all over the cot. How can a little being like my boy produce such a powerful blast of gas and poo? Though we ended up with quite a cleaning to do, hubby and I just can't stop laughing about it.

I made three changing pads so far. Two are kept for use at home. We use the last changing pad when we are out and thus I made a diaper pouch to go along with it. The diaper pouch can hold a travel pack wet wipes, the changing pad, four diapers and some plastic bags. I thought it would be handy to have all the essentials in one pouch and I just have to carry my baby and the pouch to the baby room for his diaper change.


I followed these helpful tutorials (pouch and the changing pad) with some slight modifications: 1) Instead of having the elastic strap to hold the changing pad, I added a pocket. 2) I added a strap for the pouch. 3) I added a thin padding for my changing pad. 4) I made my pouch slightly wider with 8" by 22" fabric to accommodate the padded changing pad.

I bought the iron on vinyl from Amazon and it cost close to 30 bucks. It's expensive but still cheaper than if I purchase it from Spotlight (cost almost 50 bucks). It can be very frustrating finding craft materials in Singapore, things are either very expensive or the shops just don't have it. To be honest, it's definitely cheaper if I just buy the changing pad from shops. But that won't stop me from crafting and sewing because the satisfaction of seeing my completed creation is priceless!